React Native Animation Tutorial: Creating Animations with Reanimated

Smooth animations are a big part of making applications more user-friendly and easy to understand. In this article, we are going to discuss the process of creating animations using React Native Reanimated.
React Native simplifies cross-platform application development in a significant way. It allows the developers to use a single codebase to build custom mobile applications on Android and iOS, focusing primarily on the application code as a whole, without worrying about platform-specific APIs and quirks too much. But in spite of the simplified model, creating animations with React Native can still be quite challenging. So, here's where the React Native Reanimated library comes in handy.
Overview: React Native Reanimated and How It Works
There exist numerous React Native libraries, and Reanimated is a React Native animation library that helps to build smooth animations and gestures. It has been designed to match the React Native's API while being more accurate in defining interactions. Reanimated is a library that replaces the Animated API, providing APIs based on JavaScript, which are easier to use and run on the native thread, enhancing performance.
Most of the animation logic is dealt with by the JavaScript thread. Another important thing is that now it is possible to use worklets and hook-based animations. This allows you to write in JavaScript instead of using declarative codes, which are not as intuitive. For those looking to expand their animation capabilities beyond mobile applications, exploring an AI animation generator can offer a powerful tool for creating animations with ease, leveraging AI to streamline the animation process across various platforms.
Benefits and Limitations
Reanimated version 2 has a number of improvements compared to version 1:
- This model allows the animations and the entire application to perform better.
- The animations are written in JS in the form of so-called "worklets", which are pieces of JS code extracted from the main react-native code and run in a separate context on the main thread.
- Due to the new API, you will need fewer "Animated Values" to create an animation in React Native.
- The animations can be created in different ways: triggering animated change on a shared value or returning the animated value from the useAnimatedStyle hook.
- The worklets can serve as event handlers. It is possible to define a separate worklet for handling each handler state.
Though Reanimated version 2 has improved a lot compared to Reanimated 1, it is still in its early days, so there can be some limitations:
- It doesn't support remote debugging. You can use Flipper for debugging your code, but connecting debuggers that run on the UI thread is not available.
- Objects passed to worklets from React Native don't pave the correct prototypes in JavaScript, which somewhat limits the ways you can use them.
- Animating the virtual components of layout, like nested <Text> components, is not supported.
Still have questions about creating animations?
Upsilon experts have a profound experience in tech and IT and are ready to help. Contact our team and they will answer your questions and help you make things out.

How to Create Animations Using React Native Reanimated
Now let's have a look at some examples of creating animations using React Native Reanimated.
Example 1: Animated Contacts List
1. Install Node.js.
2. Install yarn.
3. Create a project.
4. Navigate to the project.
5. Install React-Native-Reanimated and other dependencies.
6. Starting a development server:
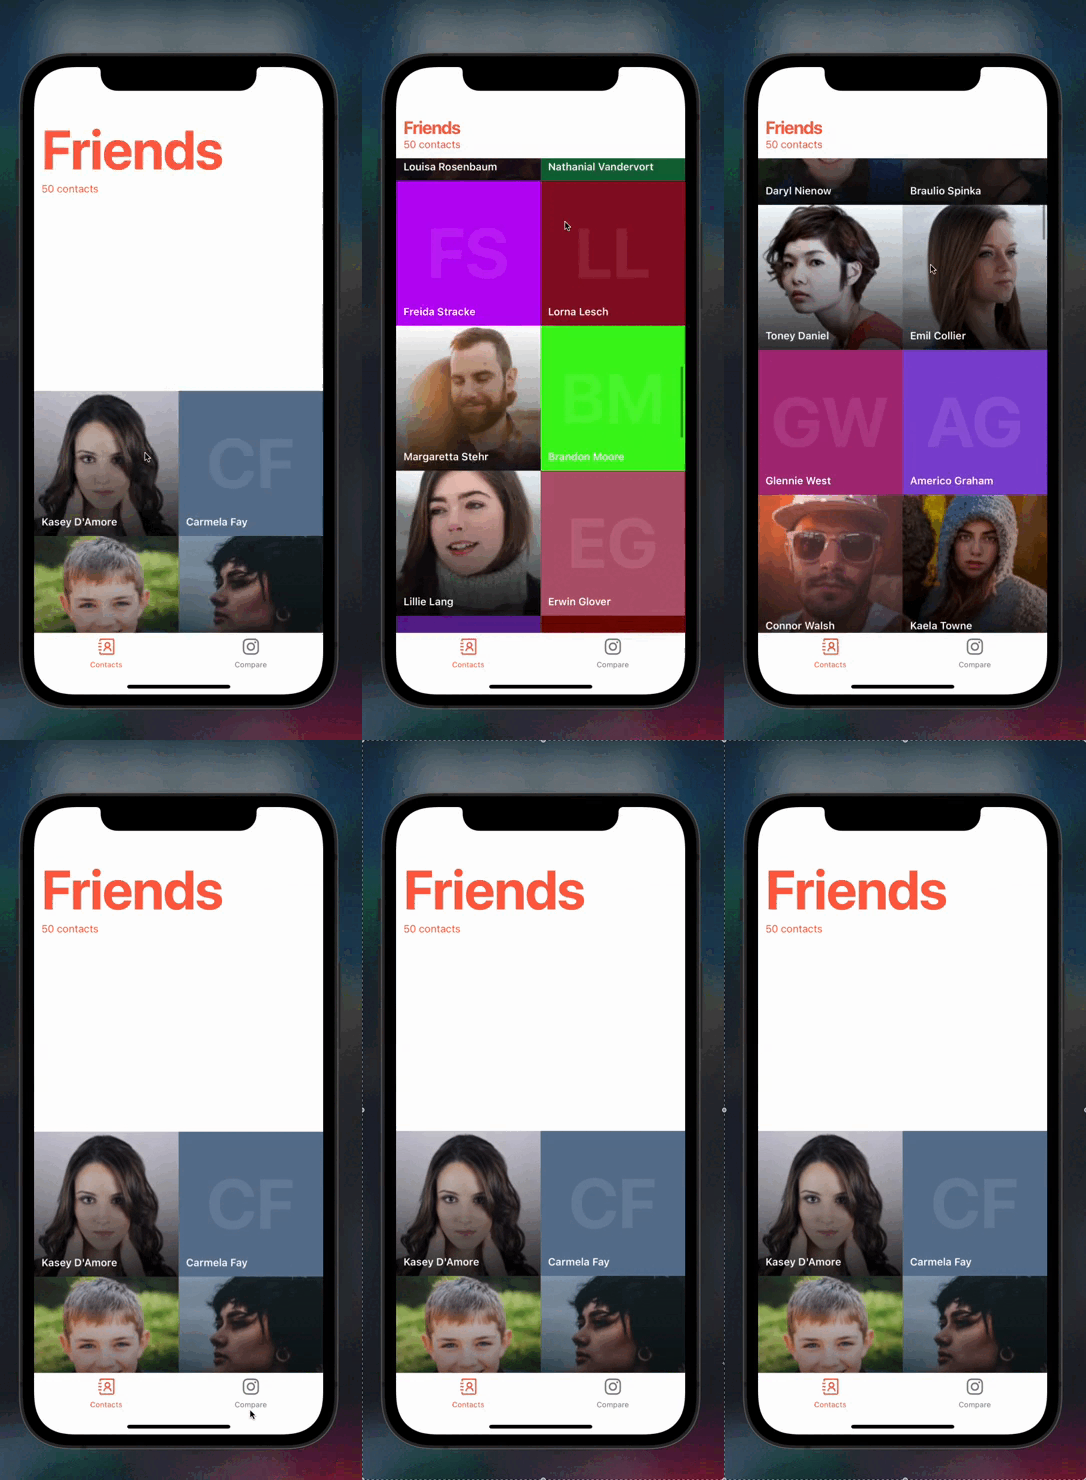
Let's start by creating an animated list of your contacts. We will use @faker-js/faker to create fake users, which generates massive amounts of fake (but realistic) data. As a result, we'll get a list of contacts with names and avatars and, thanks to animations, a nice UI with an animated header.
RN's FlatList component isn't animatable by default, so we need to make it animatable using the createAnimatedComponent method by Reanimated. This allows us to pass animated props or styles to this component.
We want to animate the header based on the onScroll method in our FlatList. Thanks to a convenience hook useAnimatedScrollHandler, we can use the scrollY value to interpolate the header.
When we think of animation, we generally think of animating various styles. Reanimated gives us a useAnimatedStyle hook that allows us to animate styles using shared values.
In the example above, we use useAnimatedStyle to create a style that is dynamic based on our shared value, scrollY. We pass animated styles to Animated.View and Animated.Text, and as we scroll our contacts list, the header will increase or decrease (depending on which way we scroll).
This is how our animated contacts list looks:

Example 2: Comparing Pictures Using Gesture Handler
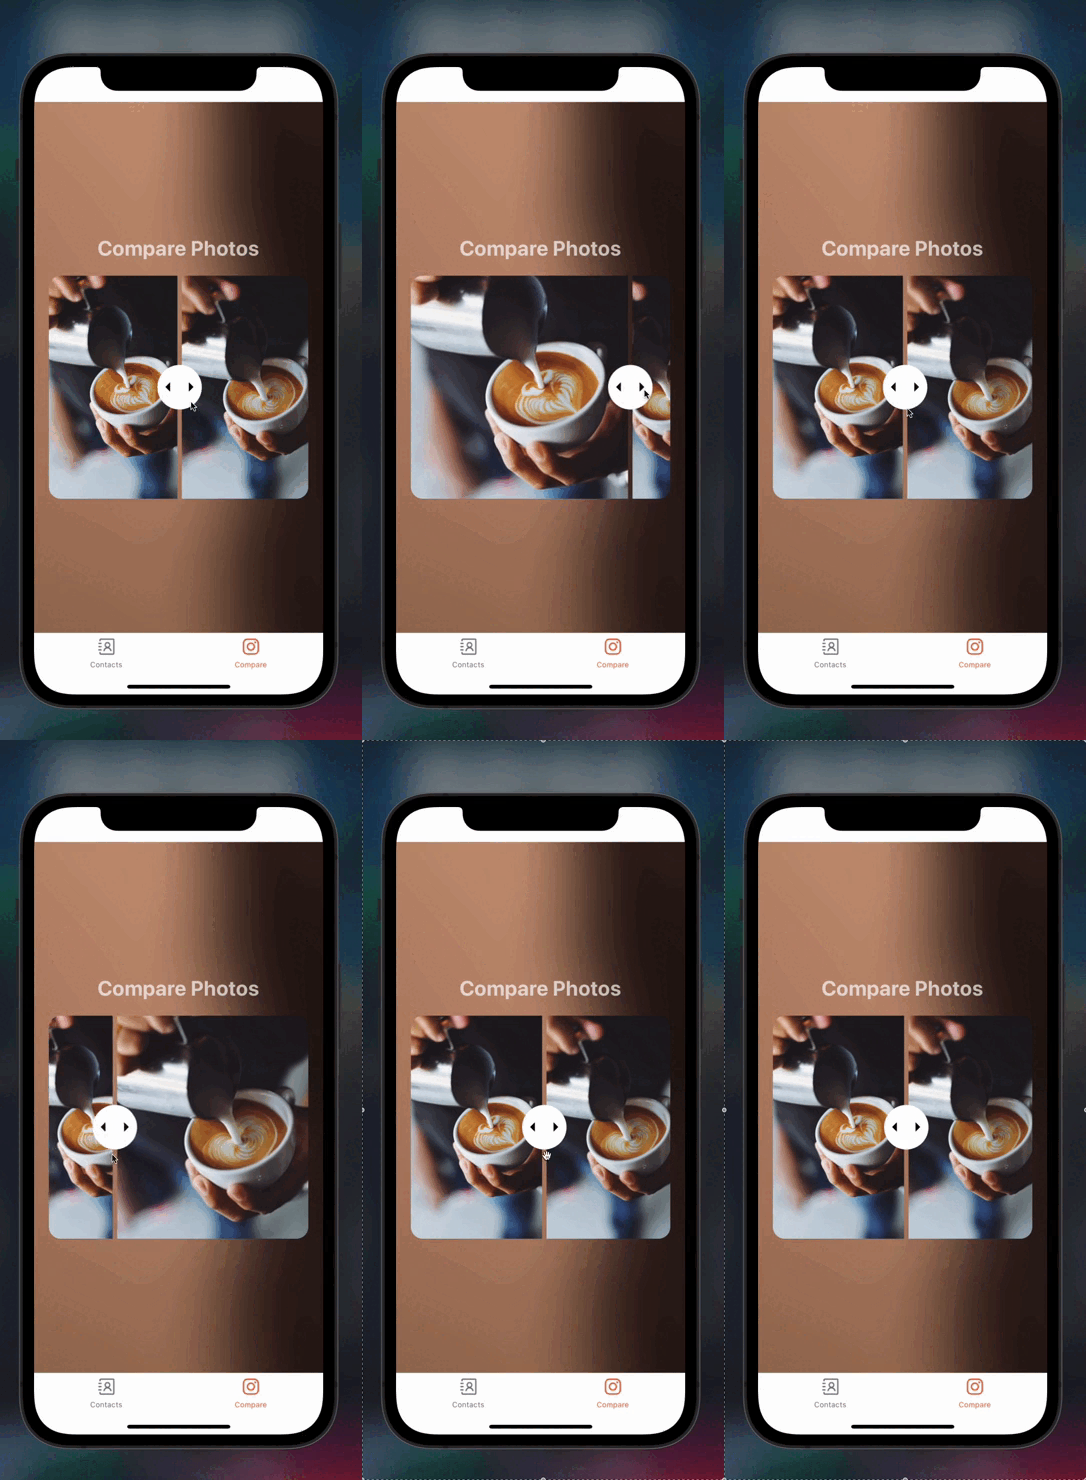
Let's continue working with animations with the following example. Imagine that we want to compare two photos. And to do this better, we need to enlarge one of the photos by swiping to the left or right.
Reanimated provides a useAnimatedGestureHandler hook that allows us to configure a gesture handler declaratively, and then we can provide that handler to a gesture handler component. If we are interested in handling the movement of a finger on the screen, we need to receive a continuous stream of touch events. For this purpose, PanGestureHandler from react-native-gesture-handler package can be used.
We need to dig into some of this code, though. The useAnimatedGestureHandler hooks allow us to configure our gesture handler based on various lifecycle hooks for the gesture, such as onStart, onActive, onEnd, and so on. The handler has a context object that we can use to pass information between the different lifecycle methods, which is quite useful for stateful gestures. We use the onStart method when the user starts to pan the handle, so we can attach the current progress value (or the progress value at the start of the pan) to the context object and use it later in the useAnimatedStyle hook for our photos.
Next, we use the onActive callback, which is called as the user is actively panning. This callback exposes an event object, as well as the previously mentioned context object. The event object will tell us how much the user has panned since the start via the event.translationX property. To determine the new progress value, we take the starting progress value and add to it the amount by which the handle's horizontal position has changed (e.g., (final value) = (starting value) + (change in value) ). Technically, this is all we need to enlarge or reduce the photo by swiping.
This is how our feature for comparing two photos looks:

If you want to study the code examples in more detail, you can do it in the repository on our Github. Here you will be able to find the whole code that we used and some extra components necessary to make everything work.
Looking for a reliable tech partner?
Upsilon's team has talented experts who can help you develop your product.

Conclusion
Hope that this article helped you learn more about the Reanimated library, and how it makes the creation of React Native animations quicker and easier. Also, we created two animation examples to showcase some of the useful animation techniques and how they can be used together with Reanimated.
Though Reanimated 2 is still in its early days, it has a bright and promising future. If you still have questions about creating animations in React Native, feel free to contact our experts, and they will be ready to consult you and tell you more about our React Native development services.
to top


