How to Do Map Clustering with React Native

Most developers working with React Native or any other programming language for mobile app development sooner or later get a project where they need to add maps to a location-based app. Here they meet the challenge of lack of performance. The more data it is, the worse performance can become.
Why does this happen? The reason for this is excessive re-rendering. It means that there takes place more frequent rendering of components than it should, which is time-consuming. Such rendering does not relate to the component (marker in this case) but changes in part of the state. While allowing only necessary re-rendering with changes in the state of the marker, the performance will become distinctly better.
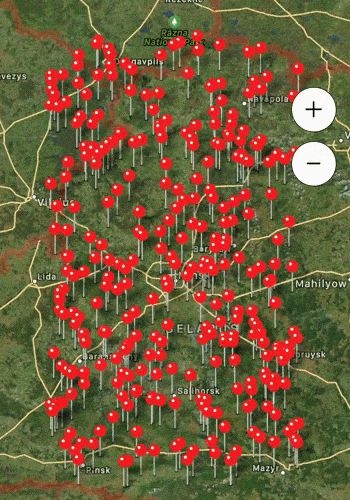
Moreover, when operating with lots of markers, the map becomes overcharged and can negatively impact the mobile UX. Displaying all the markers at once creates a poor user experience.
At Upsilon, we had this issue with events on our map in one of the recent projects. With a small number of pins, the map looked fine. But when increasing the number of markers, the map looks cluttered and does not provide the best overview of where events are happening.
The most intuitive solution here is to use clustering. By clustering the markers together (zoom-out feature) and de-clustering (zoom-in feature), you can greatly improve app performance while presenting the data in a more approachable way.
In this article, we will describe in detail how we did map clustering with React Native, which is one of the most popular mobile app development frameworks. We'll also provide you with the programming code we used.
Need a hand with mobile app development?
Upsilon's developers will gladly put their React Native expertise to use when working on your project.

Setup
1. Install Node.js.
2. Install the Expo CLI and yarn.
3. Create your Expo project.
4. Navigate to the project.
5. Install Super Cluster and other dependencies.
6. Start up the server.
Implementation
Let's start with creating a basic map using react-native-maps library and adding some markers. This will construct a native MapView that is used to render the Map component on the screen. We pass the Marker components inside the MapView and it shows them on the map.
If you've ever used react-native-community's react-native-maps package to add a native MapView to your react-native app, you probably encountered the common issue of cluttering the map with pins, icons, and other content.

We decided to solve this issue with the mapbox/supercluster library. Supercluster is a geospatial point clustering solution for a cluttered react-native-maps MapView. It is easy and fast to implement, and it works pretty much out of the box.
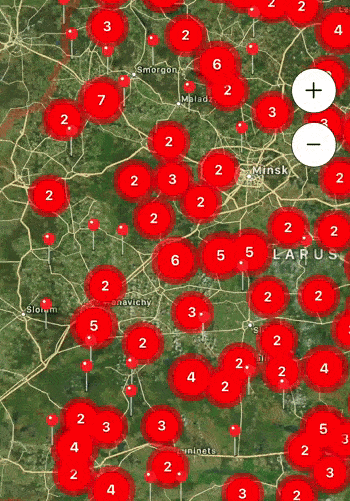
Cluster logic is used for combining some amount of markers (let's say for 5+) into one clustered marker when we zoom out the map. Clustered marker contains the number of markers inside and when we press on it, it zooms the map in and shows the markers that were inside of the clustered marker.
We also need the mapbox/geo-viewport library to turn the bounding boxes into centerpoint & zoom combos on the maps.
Implementation of basic clustering using SuperCluster a its integration with MapView can be done in a few steps:
1. Install SuperCluster and mapbox/geo-viewport using Yarn:
or NPM:
2. To integrate clustering into react-native-maps' MapView, we need custom markers, types and helpers used for geodata processing, styling clusters, etc. You can find them on our Github.
3. To finish it off we need to put together the basic map, custom components, and the cluster logic, and the code should look like this:
After implementing the steps above, you will get a Custom MapView component that has clustering functionality.
This is how the Clustered Custom Map look:

We have created a repository on our Github where you can explore code examples in more detail. Also, if you decide to use this article as a guideline, you may need some extra components to make everything work, so be sure to check out our Github with the whole programming code that we used or reach out to us for React Native development services.
Concluding Thoughts
Clustering makes the map light and allows users to have a clear overview of everything that is happening instead of hiding the map on top of markers that overlap each other. Quickly see your points aggregated into smaller groupings of points. This provides a better understanding of how many points exist within an area. That's why it is crucial to think about both performance and UX while working on your map. With map clustering, you will be able to build faster, more responsive applications that can provide a superb user experience.
On this page, we've provided you with detailed instructions and examples of suitable React Native libraries, but if you have questions, feel free to contact us to discuss your needs and find out more about our custom mobile application development services!
to top


